Ok, you need a QR-Menu and you want it online fast. Here some tips and steps to get you started,
How To Create a QR Menu In No Time
Do some planning, use the tools
QR Menu Planning & Setup
Qr Menu Planning
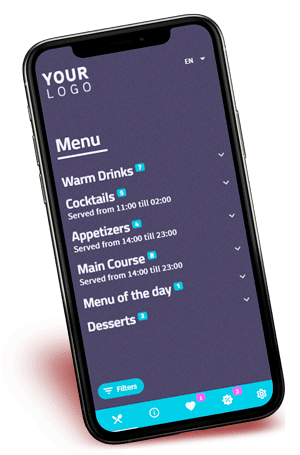
Plan the structure of your menu, UX learns us that to many options are overwhelming for users. Structure your menu in categories and subcategories so the structure is more clear and decisions will me made faster.
Start with writing down all categories and subcategories, order them till you got a balanced menu.
If you have over 15 categories you could try to narrow it down with the use of subcategories.
Create an Account
Go to https://my.chosio.io/auth/register and create an account.
You can make use of Google Facebook or email .
Your Company Details
Now you can start with your account setup. First select your country.
The second step is optional, you can enter your company details and VAT number.
Why enter company details and VAT number? If you make use of a premium subscription, your company details will be added to your invoice.
If you are an Europe based company outside Spain and you add your VAT number, we will reverse charge your VAT.
Create your Place
Your place is the starting point for your qr menu. We make use of google maps to find your place, this way we already know important information about your business.
Click on the "ADD PLACE QR" button
Find your place with "<company name> <your city>" e.g "Grillhouse Amsterdam".
Select your place in the results
Choose your chosio URL.
Create your First Menu
On your dashboard click on the "ADD MENU" button
Set the menu name this is for your reference only.
Select your primary language
if you got a premium plan you can also set your secondary languagesSet Your currency
Now you will see your menu with some categories and sun categories loaded to get you started.
Add a Menu Item
At the bottom of a category, click the "add menu item" button.

Fill in your menu item data
if you have a premium plan you will also be able to set translations, images and price variations.Optionally you can add filters (see next item)
Other menu item settings.
On top you see 3 switches:
Offer: activate menu item as an offer (premium feature)
Active/Hidden: You can hide the menu item from the menu.
In Stock / Out of Stock: The menu item is still visible on the menu but clearly labeled "Out Of Stock"
Add Filters to a Menu Item
Filters are great to help your customer choose. There are 2 types of filters:
Labels:
These are tags like vegan, vegetarian local etc.
If you make use of the labels, don't forget to also add them to your other menu items. eg. if you use the label vegetarian, but you don't label your drinks vegetarian they wont show up if a customer only want to see vegetarian menu items.
Allergic Ingredients:
We have listed all main allergic ingredients so you can inform your customer about it.
With every allergic ingredient you have 2 options, May Contain and Contains. It is a good practice to always use this feature.
Add Category
At the bottom of the page you will find the add category button
Enter your title and optionally your description
if you got a premium subscription you can enter your translations.Icon: Some themes make use of Icons, you can select an icon if you need one.
Compact: if you make use of a premium theme, you can hide the labels and allergic ingredients in the list view. This way the category will be more compact.
e.g. On drinks you don't have to show the vegetarian label.
Add Subcategorie
Click on the add subcategory button at the bottom of a category
Enter your title and optionally your description
if you got a premium subscription you can enter your translations.Icon: Some themes make use of Icons, you can select an icon if you need one.
Edit Menu Item or Category
If you want to edit a menu item, click on the 3 dots at the right side of the item and click on "edit"
Add Menu of Choice
The menu of choice is container for menu items. and is available with our premium subscription.
Click on the "Add Menu Of Choice" Button at the bottom of the page.

Add the title and describe how your menu of choice works.
Set the price.
Add sub categories
e.g. Starters, Main course, DessertsAdd your menu items.
Reorder Menu Items, Categories & Subcategories
You can set the order of menu items by dragging them to the position you want. You can even drag them to other categories.
if you need to reorder your categories collapse them first by clicking the arrow down on the right of the category, now you can drag them in the position you want.
Translations
If you have a premium subscription you can use our auto translate function on text fields.
On top of the edit view you will find all your languages. Click on the language you want to translate.
On the right side of every text field you will find 2 icons.
The first one is the copy field. Click this one if you want to copy without translating the field.
The second icon will auto translate the field.
Download your Menu QR-Code
On your dashboard you wil find the "Download" link on your Place widget.
If you need a table stand to print out click on "Promotional Materials"